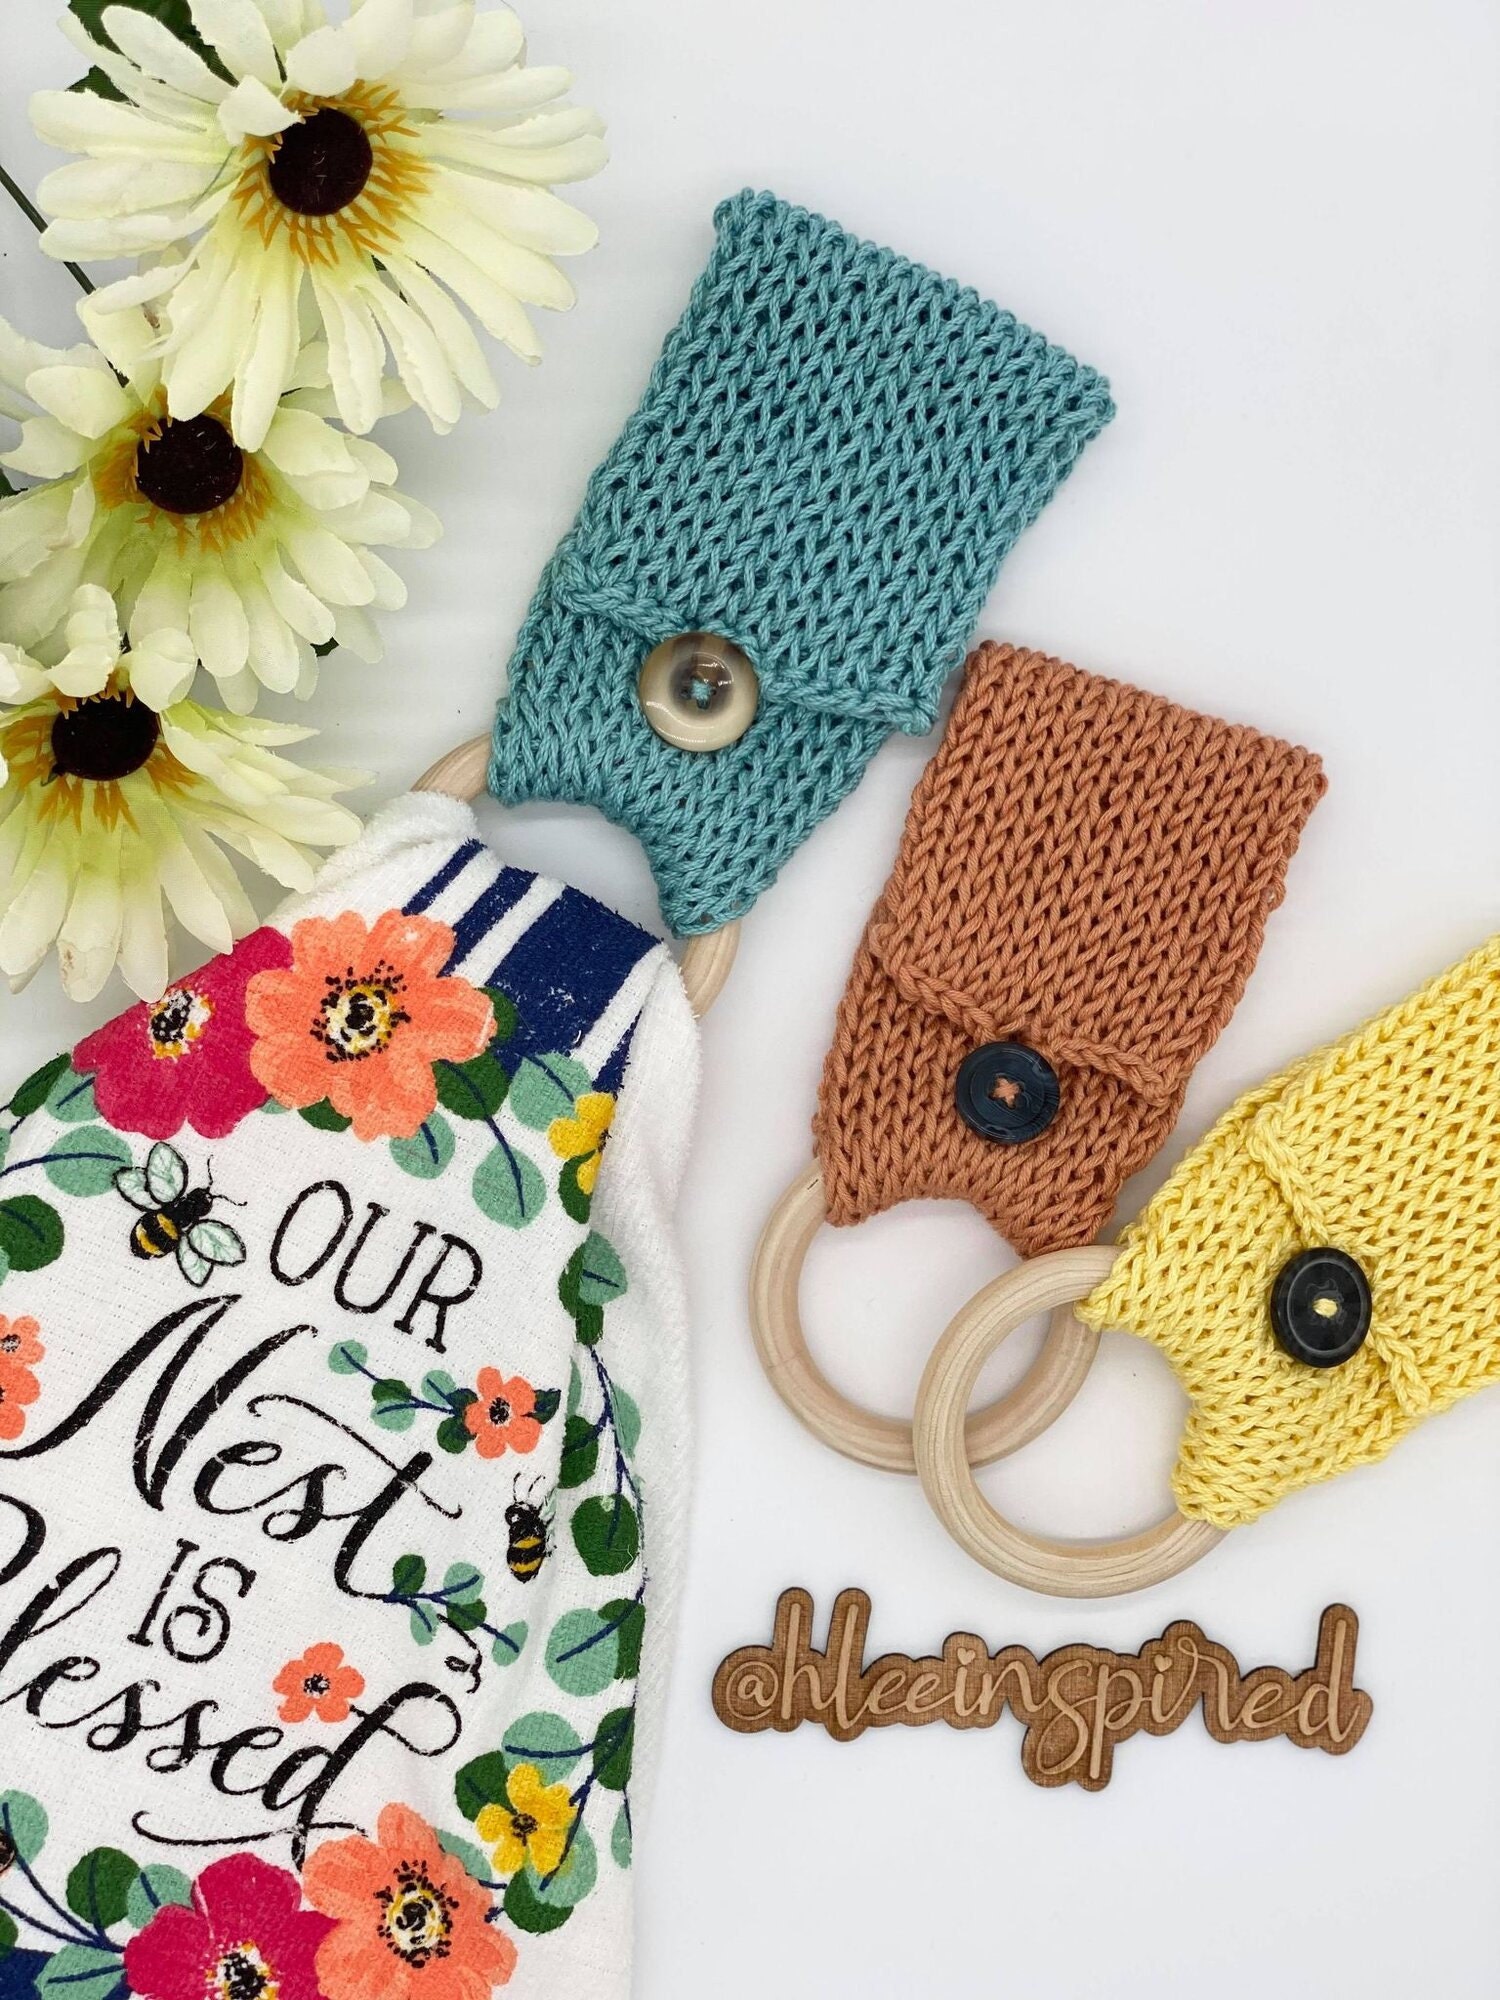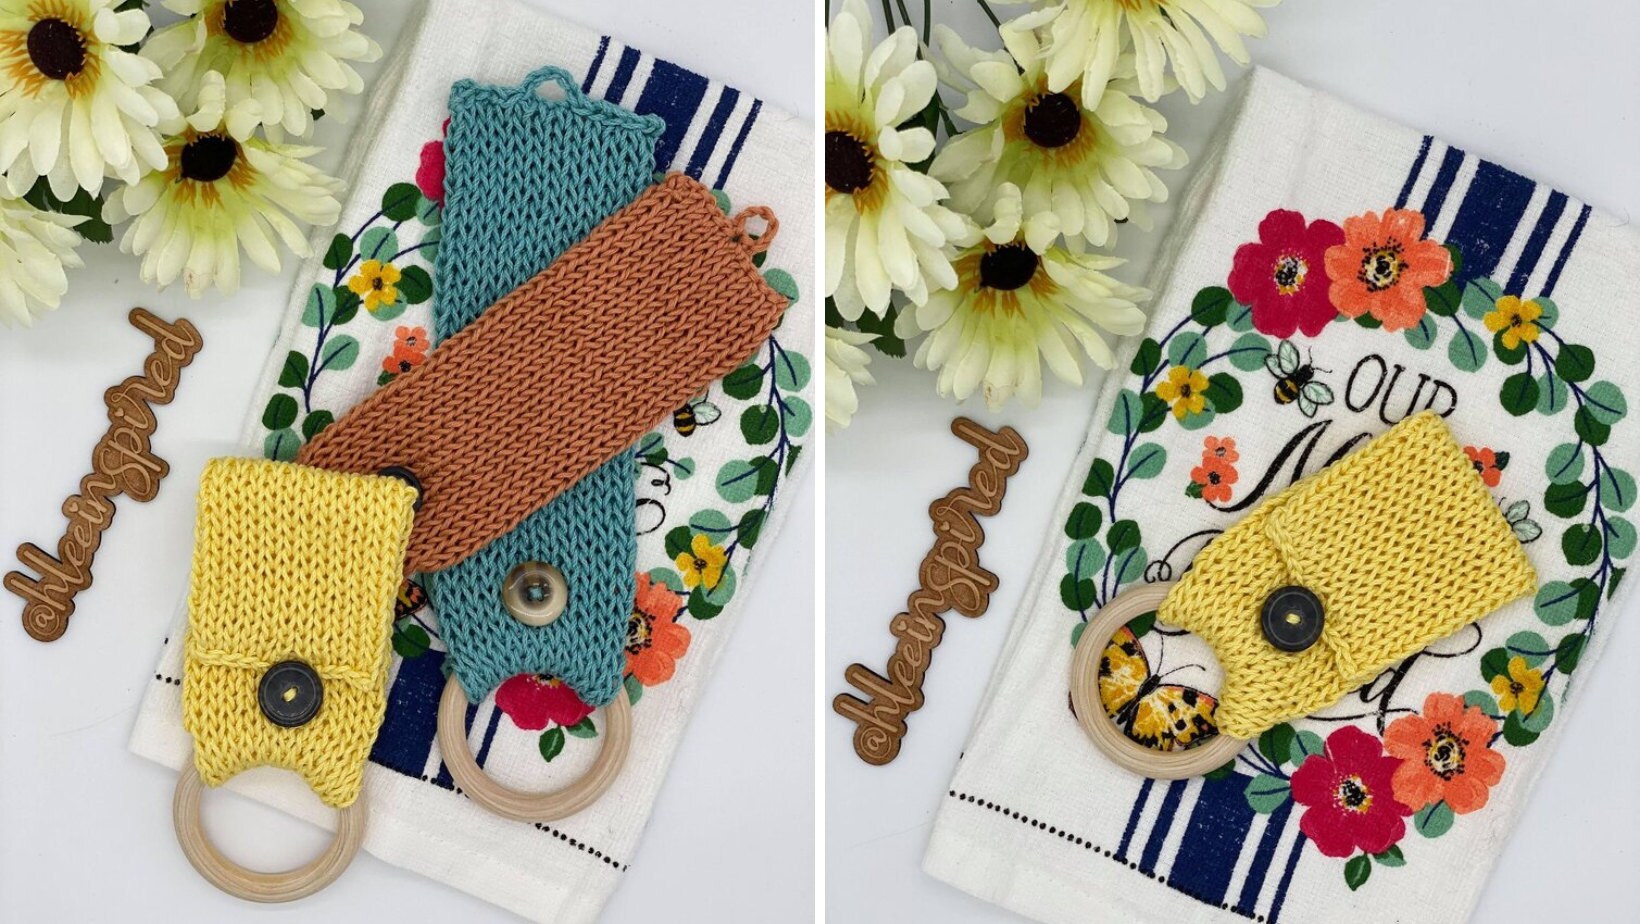
Finished Towel Topper will be approximately 8 inches from top to beginning of wooden ring. This may change slightly due to the yarn you use as each yarn is not created equally.
You will need:
- 22 needle Knitting Machine : Addi Express or Sentro 22
- Wooden Rings: any size between 2 and 3 inches will work.
- Buttons
- Tapestry Needle
- (F) 3.75mm crochet hook
- Cotton Yarn- I used Lionbrand 24/7 Cotton Yarn
LETS GET STARTED!!!
- Start off by casting on 5-6 rows of waste yarn in a contrasting color than your working yarn. You will want it to be contrasting so you can see the stitches easily when closing your ends.
- Cut your waste yarn and add your working yarn- be sure to leave a long tail approximately 24inches long. You will use this yarn to slip stitch your end closed and to create your buttonhole.
- Knit 44 rows of working yarn. Feel free to add or take away rows to make your desired length. Cut your working yarn leaving a long tail and add your waste yarn again.
- Knit 5-6 rows of waste yarn. Remove your tube from your machine and give it a good stretch. (This is the most satisfying part for me) :)
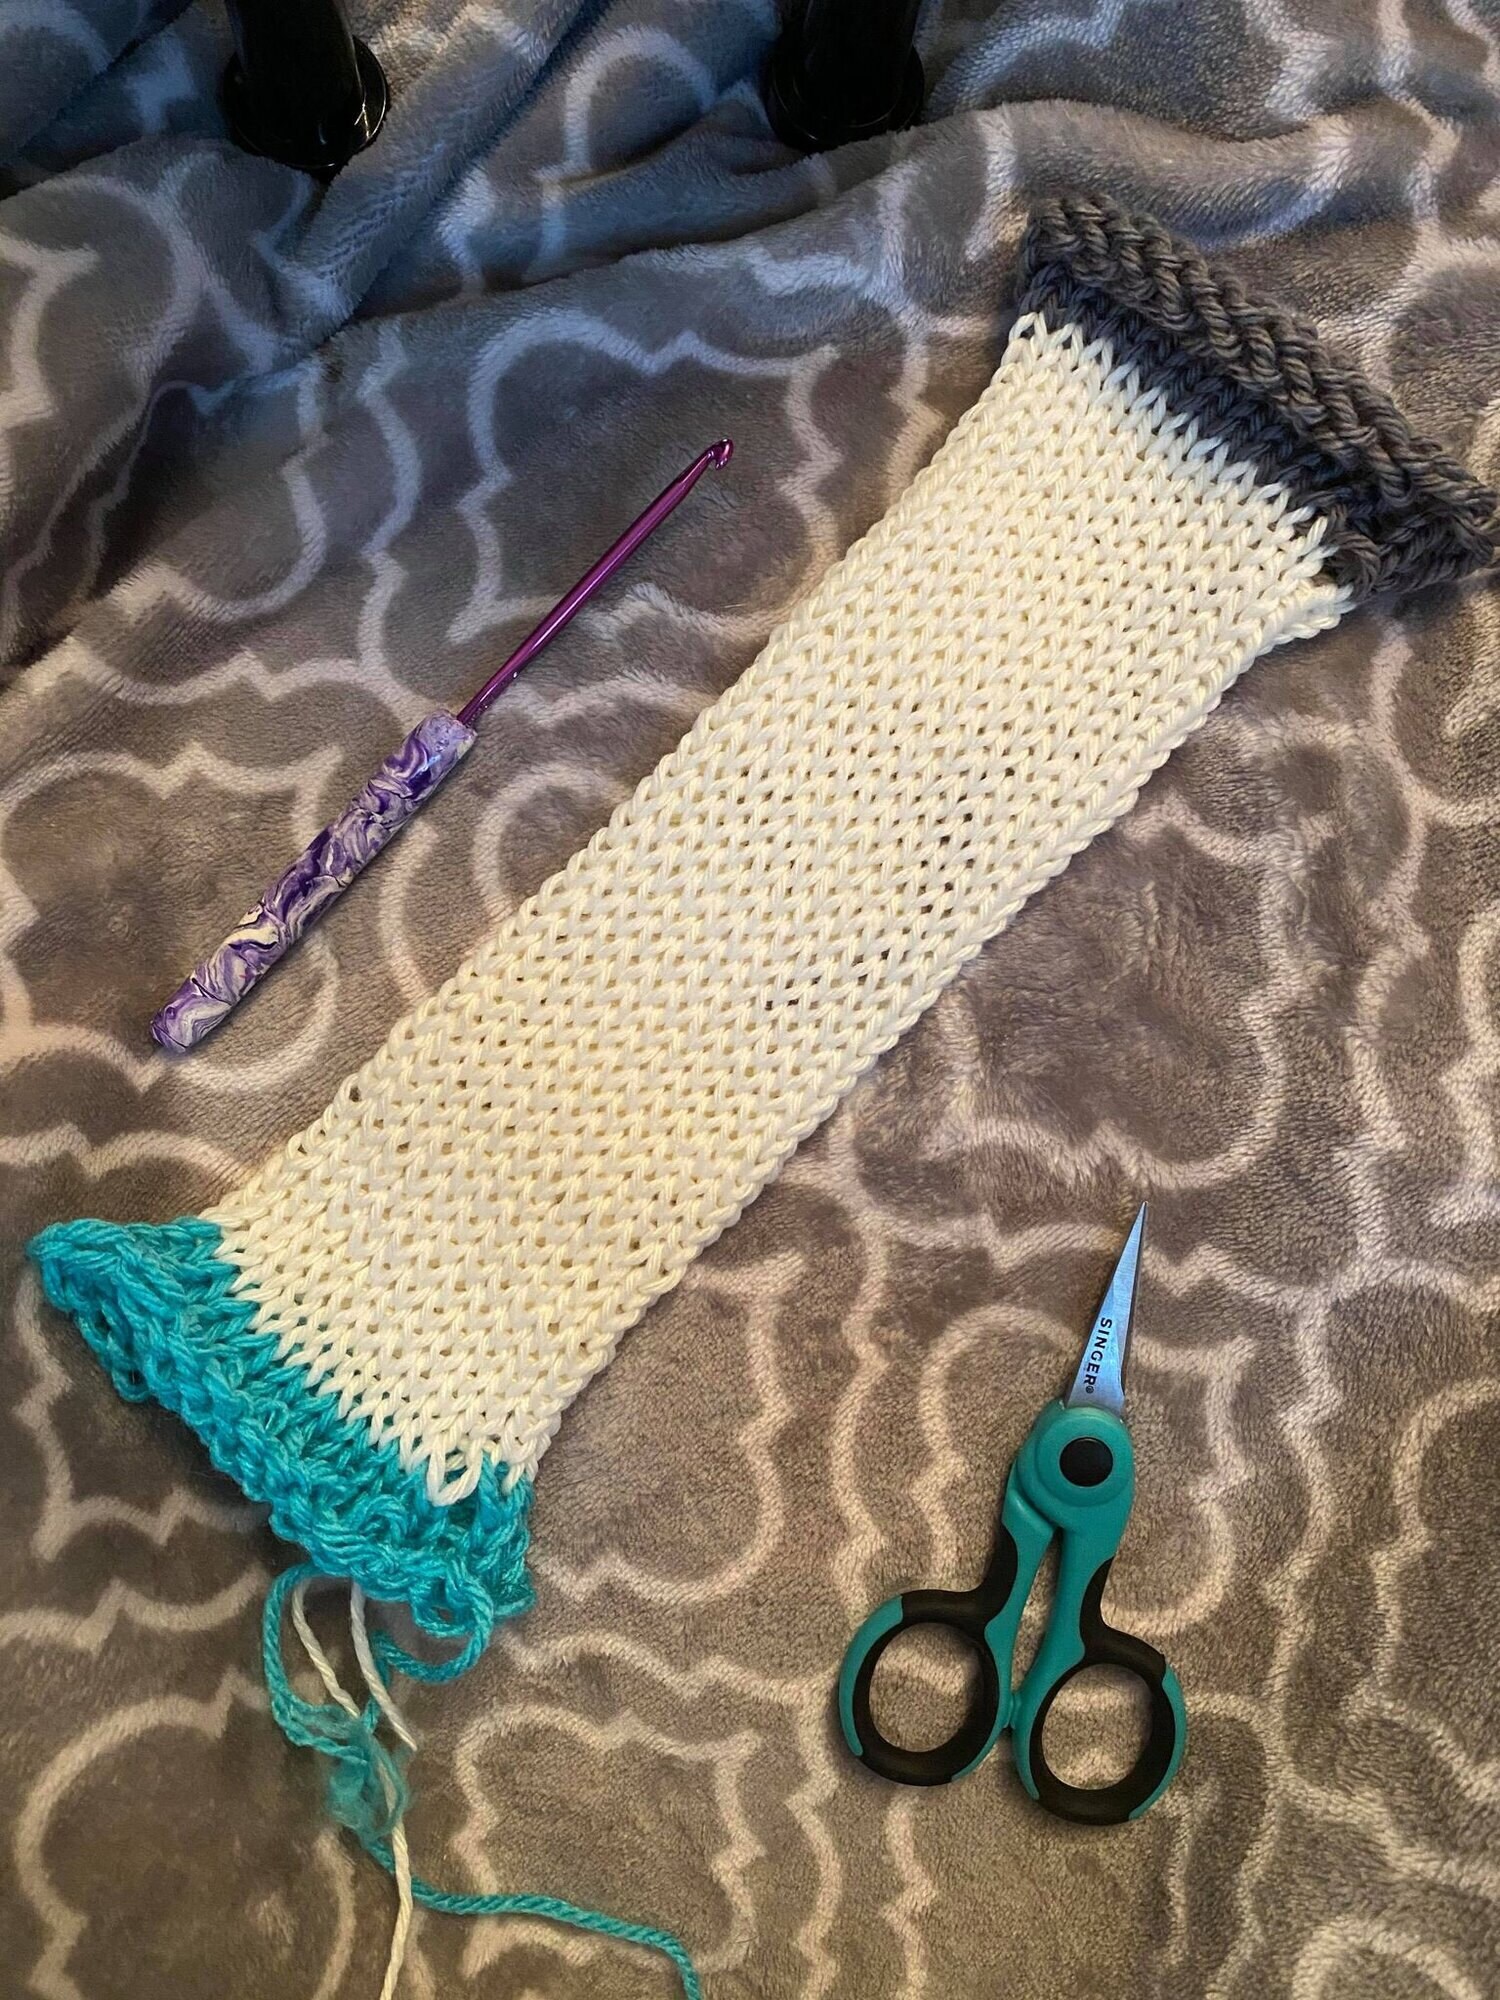
- Start on the end with your long tail. Match up your tube and insert your crochet hook through the first 2 stitches. Pull your tail through the two stitches on your hook. You just completed your first slip stitch.
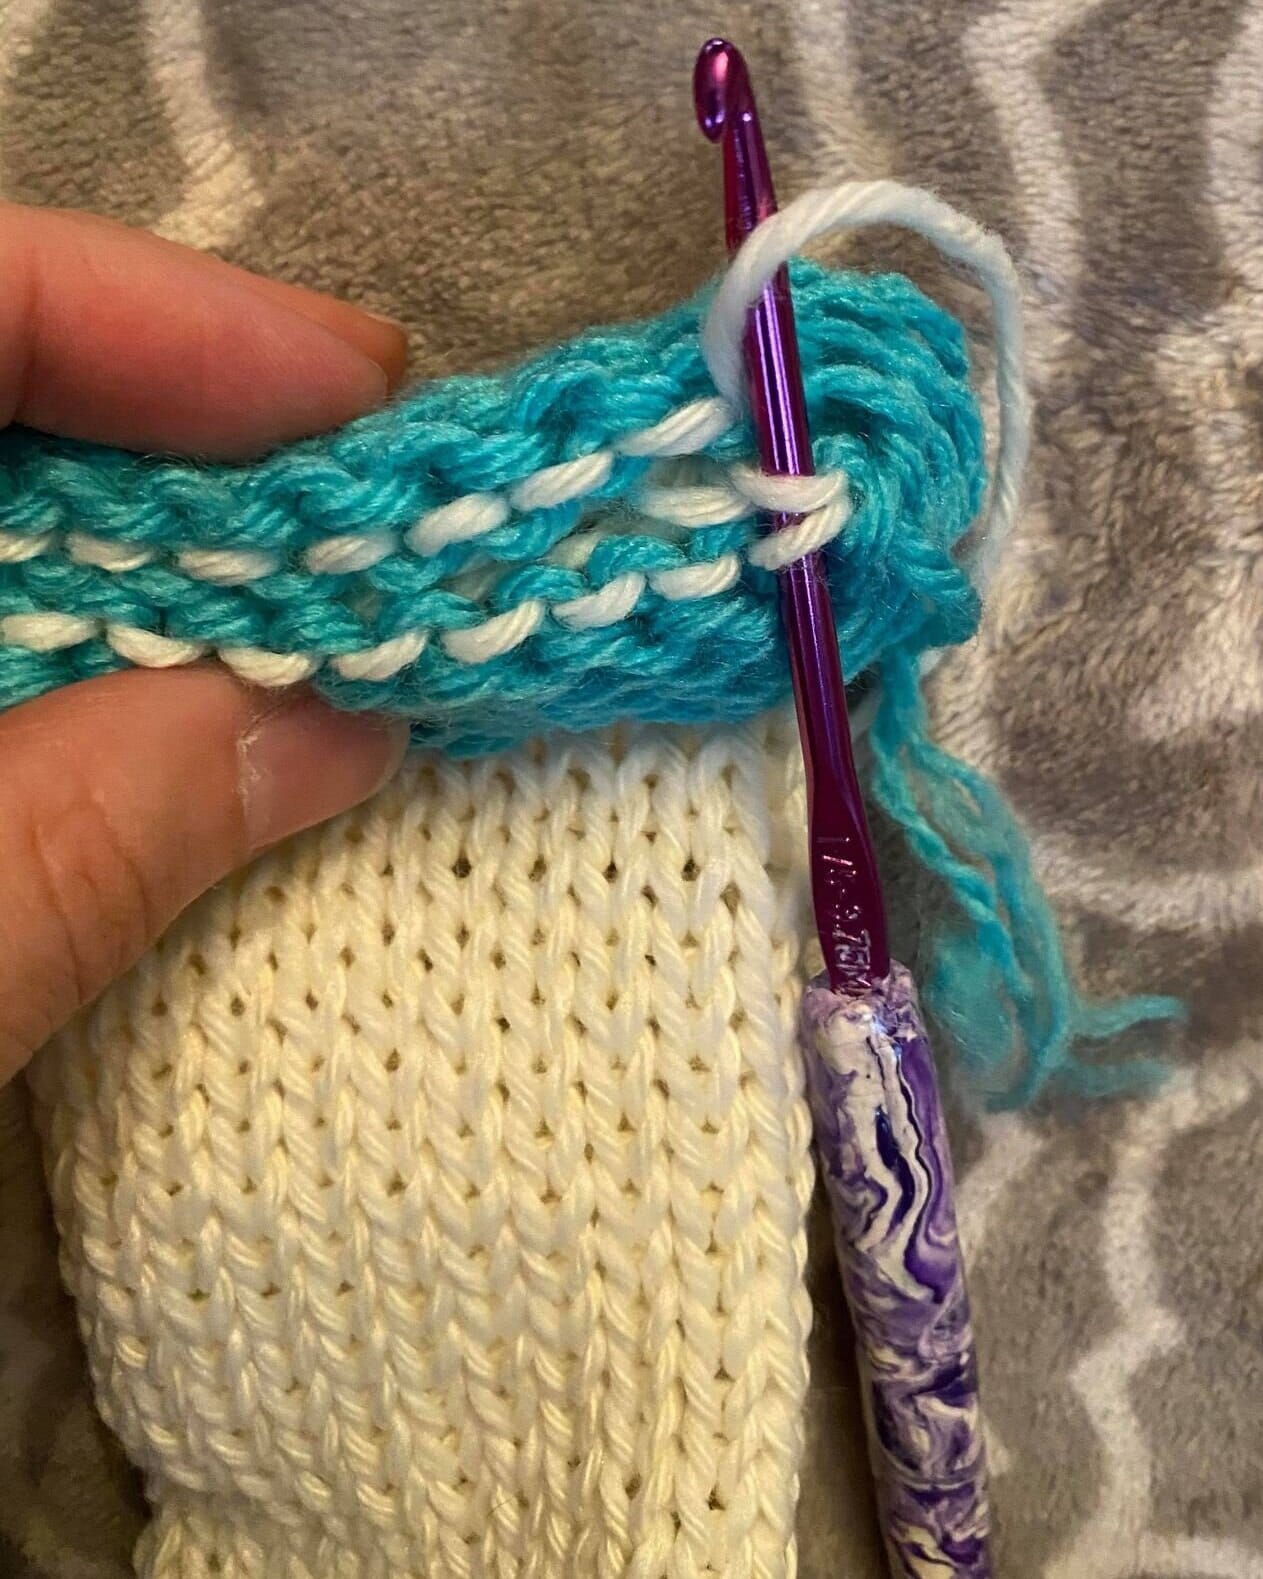
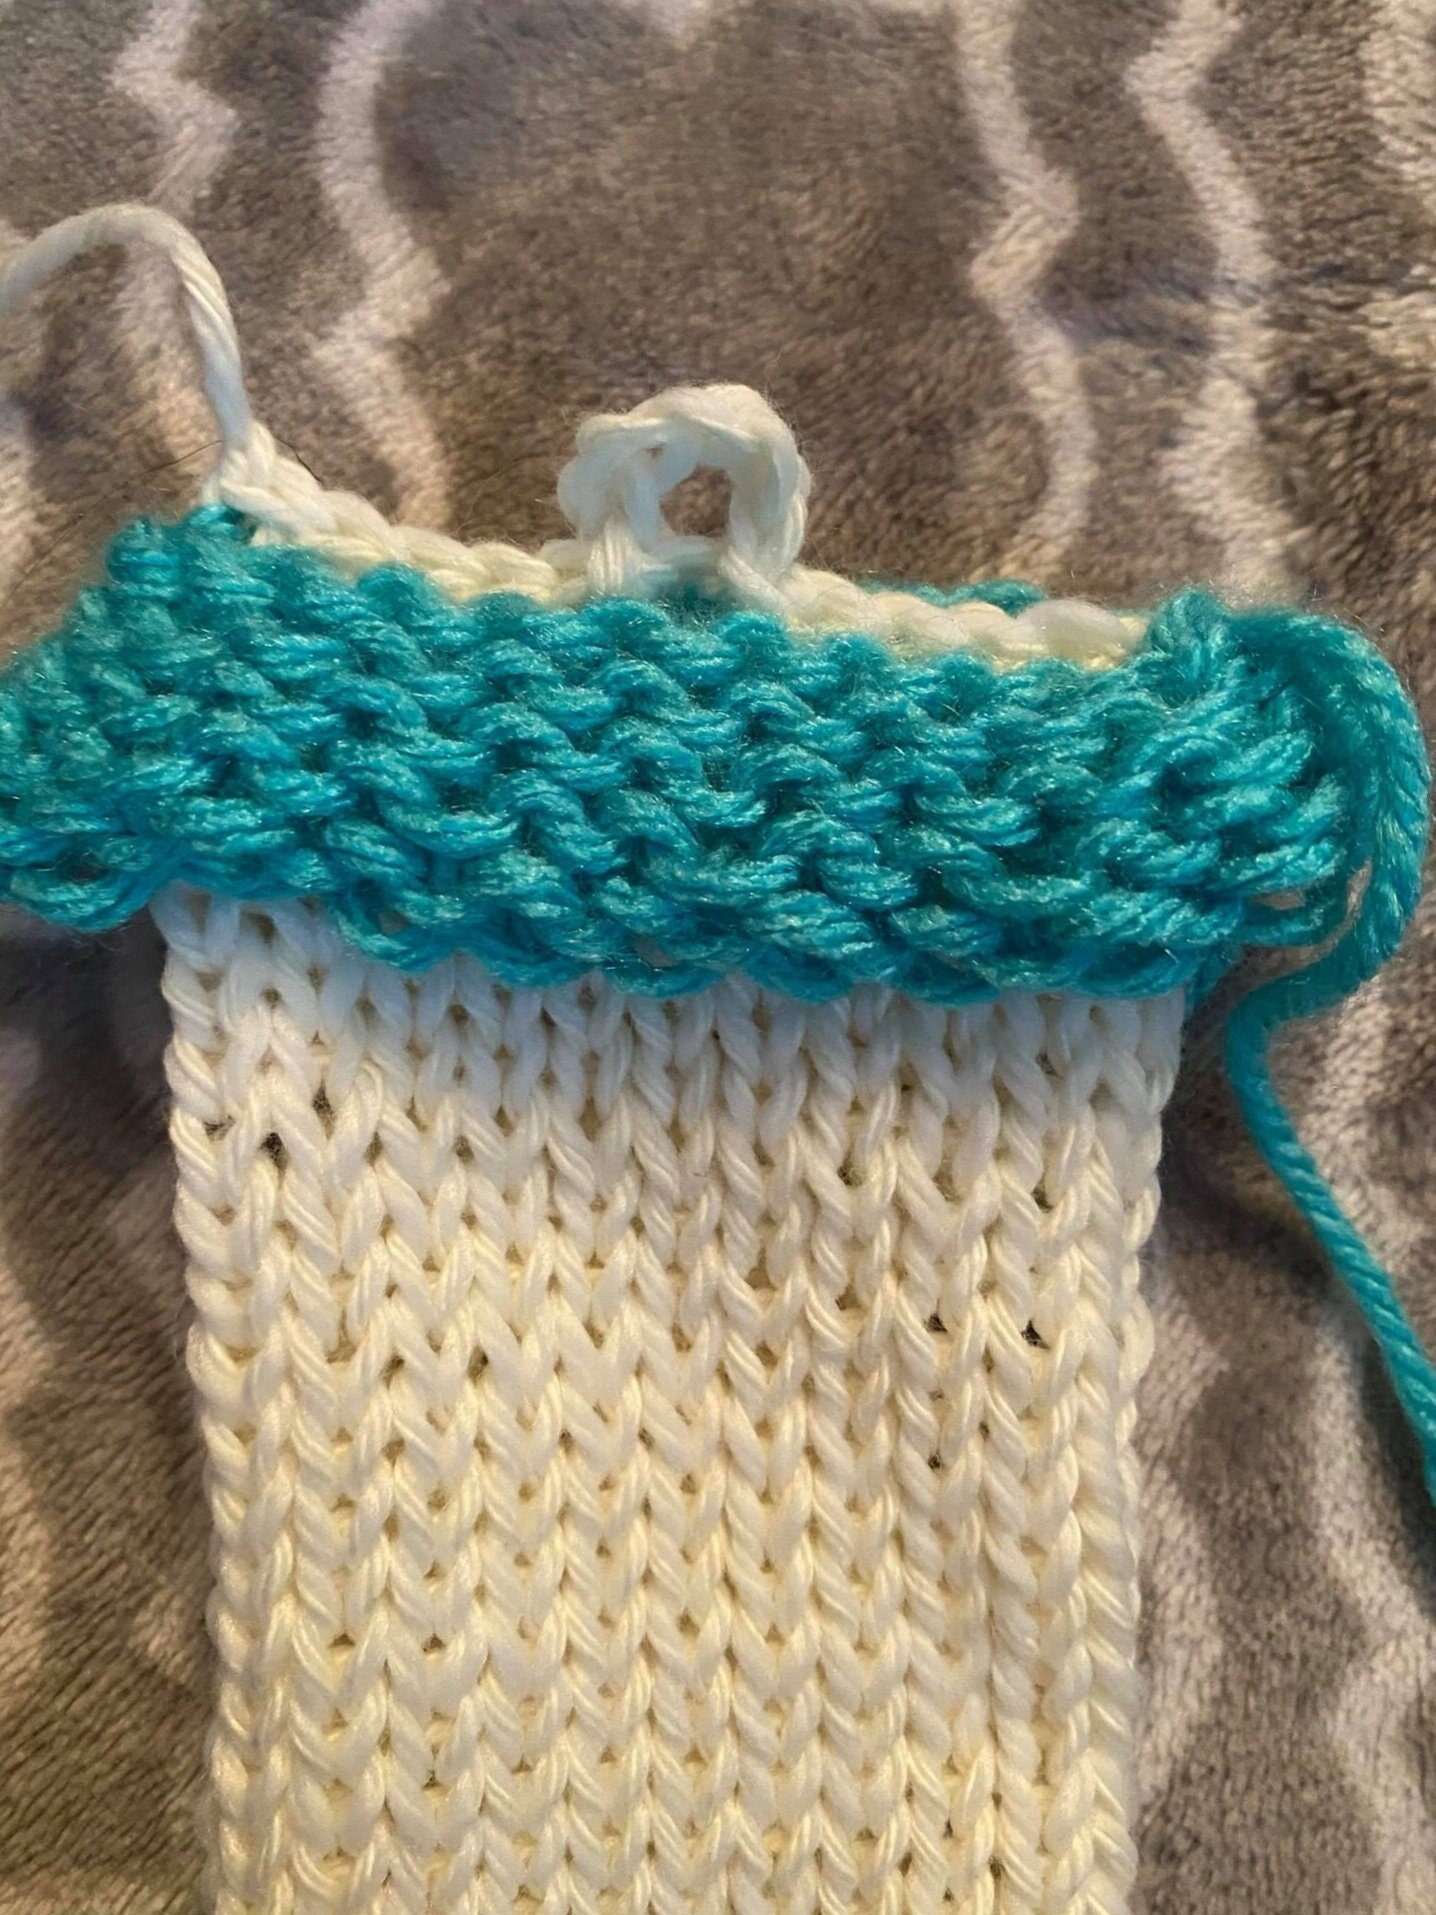
- Continue to slip stitch through the next 5 stitches. (This will leave you in your 6th stitch from the right. Chain 5, slip stitch back into the same stitch.
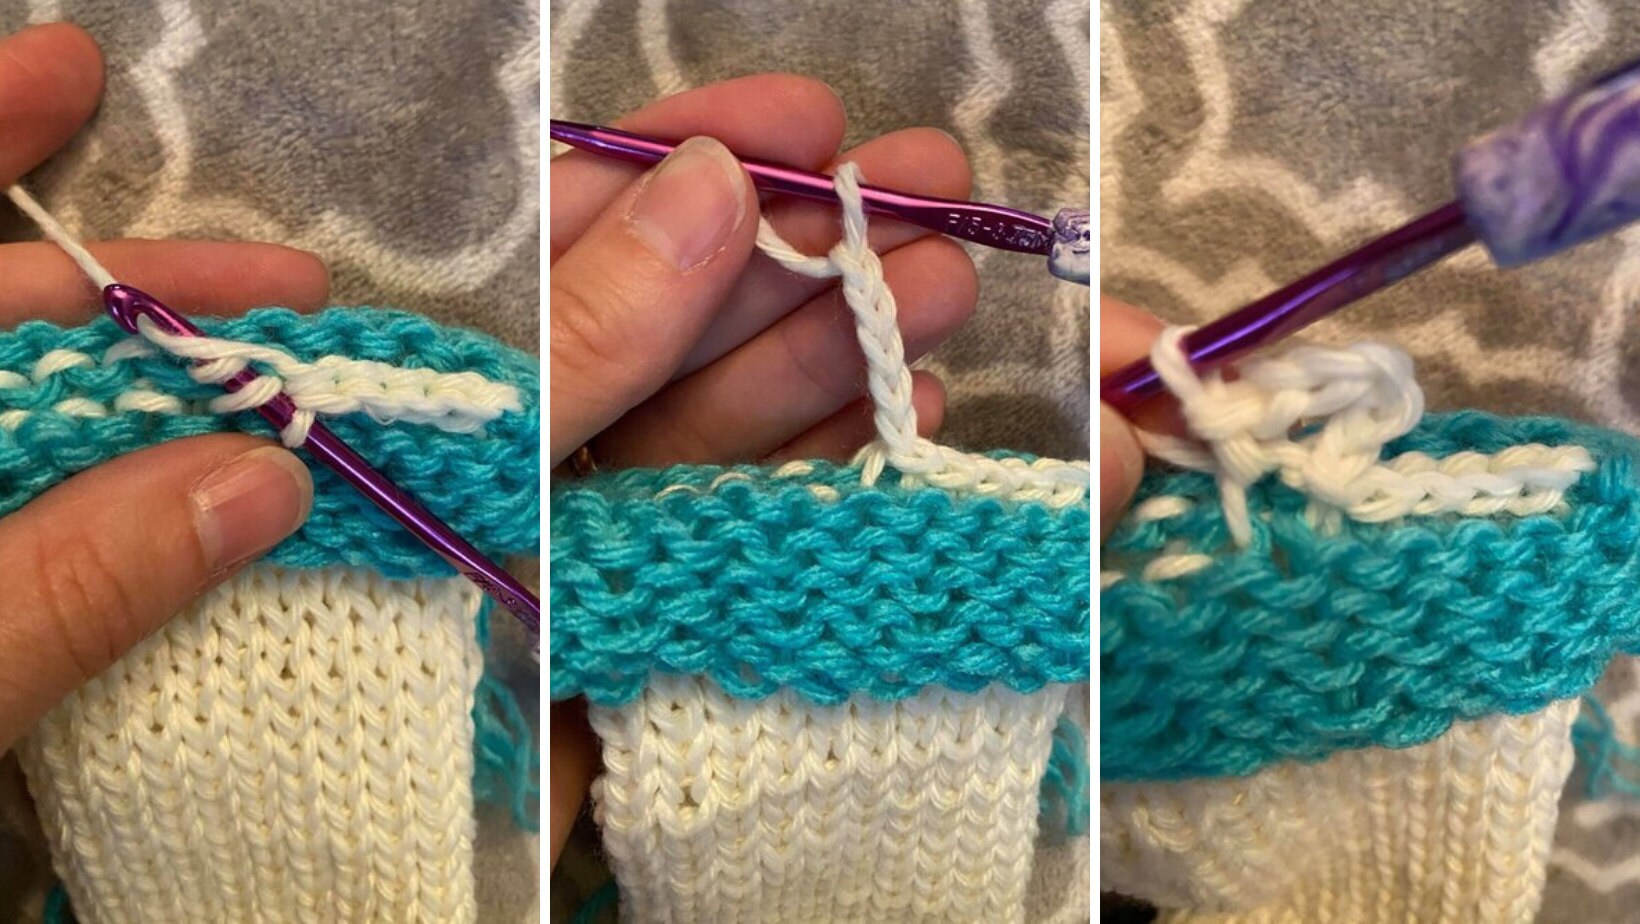
- Continue to slip stitch in the next 5 stitches. This will bring you to the end. Fasten off and weave in your end. Remove your waste yarn and move onto the other end.
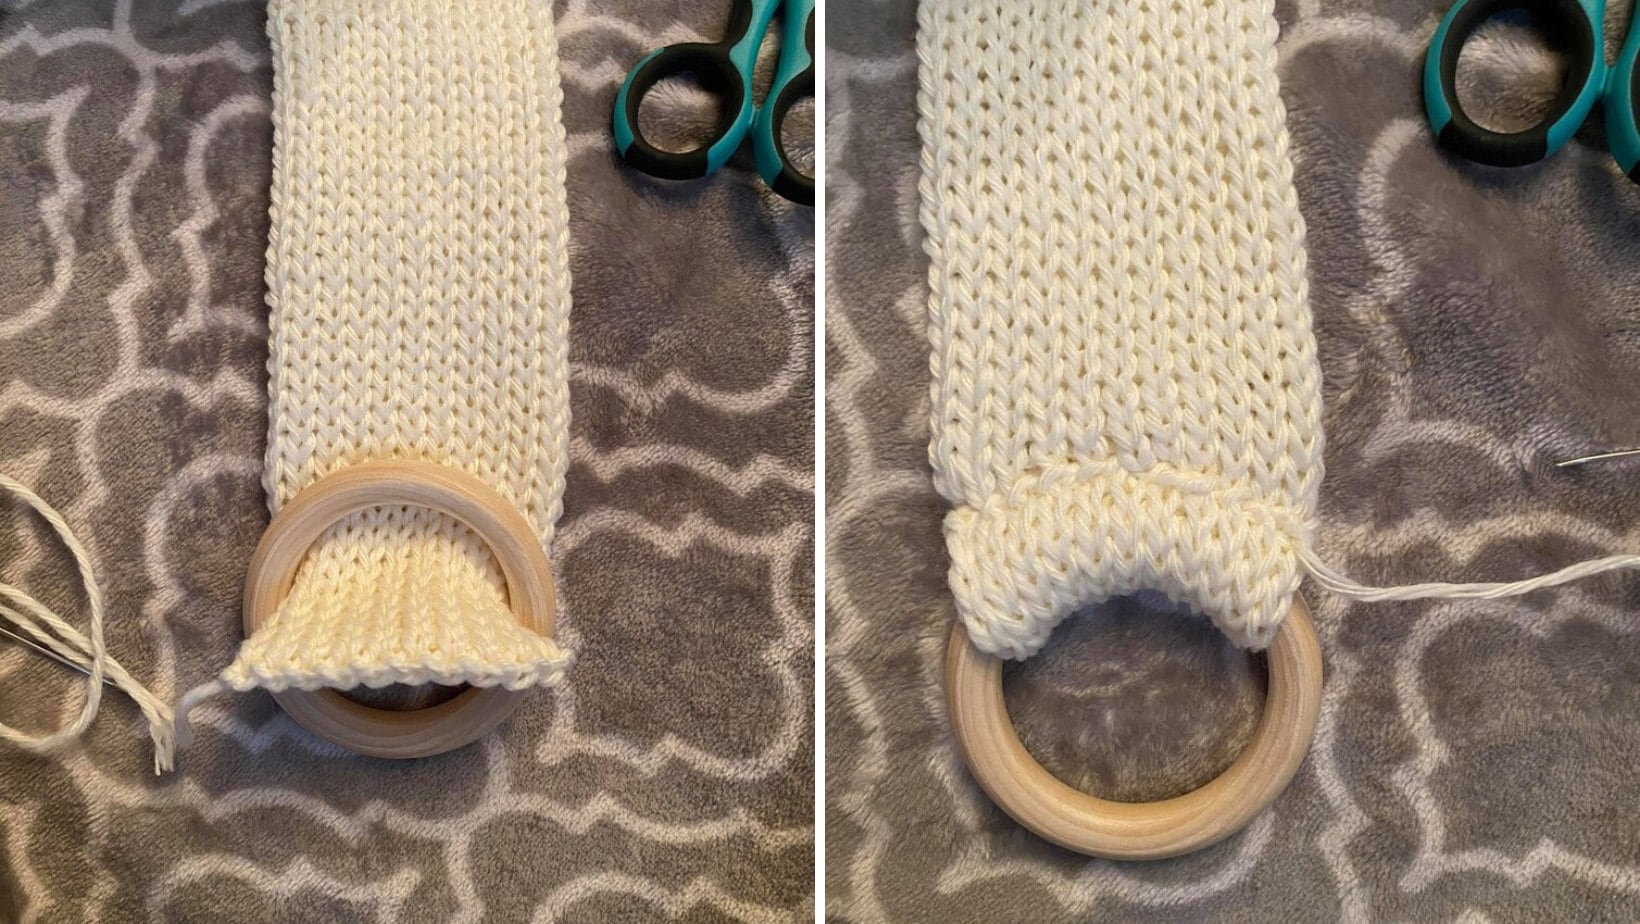
- Lay the other endflat-liningg up your stitches so they are even with the stitches on the opposite end. You do not want your tube to be twisted at all. You will begin slip stitching on the opposite side as your tail. Using the technique in the video below, slip stitch back and forth until you reach the opposite side from where you started. Pull the tail through your final stitch. Use the long tail to attach your wooden ring.
- Place your wooden ring on the opposite end from the button hole. Working in only the top layer (layer closest to the wooden ring), stitch your end around your wooden ring. Fasten off and weave in your end.
- Flip your towel holder over and add your button.
VOILA!!! You are all finished. Be sure and share your projects with me on social media. Tag me @hleeinspired and use the hashtag #lazyknittowelholder